|
|
|
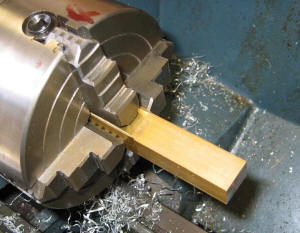
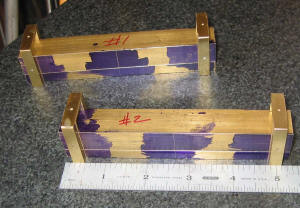
I placed each cut off section in my 4 jaw chuck and faced each end to
obtain the required length, I tried to maintain a maximum 0.001"
variation between all 4 bolsters. I decided I needed to use a few shims
to help keep tooling marks to a minimum.
|
|
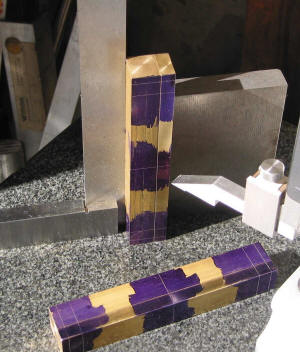
After machining to length I used super glue to bond the upper
and lower bolsters together during the layout and machining. This way I
knew each slot had to be in line. Now all there was to do is to cut
between the scribed lines and I would have my slots to spec. That should
be simple! |
|
|
|
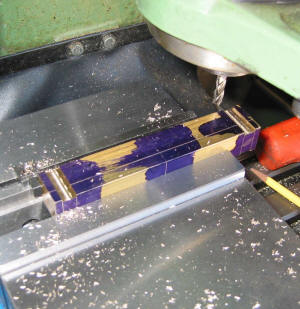
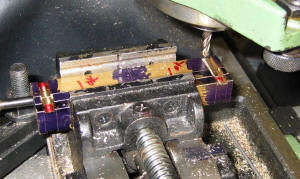
I milled all the flat work first then
carefully milled to the layout lines on each slot. As you can see the
left slot is done, to get the proper depth and to meet the tight spec of
0.621±.001" I measured my stock thickness at 0.7473" ... subtracted
0.621" then divided by 2; this gave me how much I needed to mill off on
one side( 0.0631"). But that is not really what I wanted. I then
subtracted that from my stock thickness to obtain the thickness from the
bottom of the slot to the other side or 0.6842".
|
|
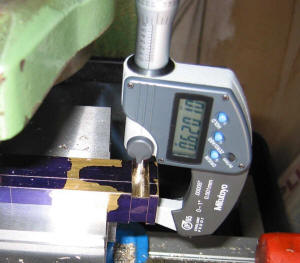
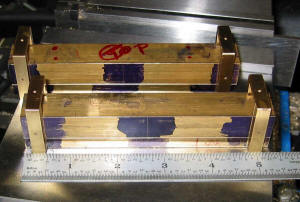
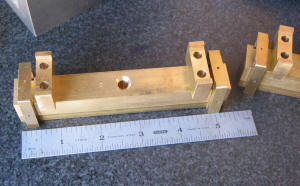
Here I am measuring the overall thickness of both slots which
should be 0.621±.001". As can be seen I am just inside the spec by
0.0001". It is important that the slot depth for each slot be the same
and the final width be correct.
|
|
|
|
After milling the flat work I moved over to my very cheap angle vise.
Before setting up with my newly machined bolster, I set up a test
material to obtain the 3° taper, simple as it doesn't need to be exactly
on. Done. So now a simple test ... how well do the columns fit the
bolster? Great ... no binding at all. Seems to be a little loose though.
Let's check the width of the slots ... okay now I'm in trouble ... the
width were out as far as .010" over the spec.
Way too much .... so I scrapped them ... started over. They were
just too sloppy, I know I can do better! So what did I do wrong? As
careful as I thought I was ... I just could not mill the taper without
milling the sides too much. I even used red ink to so that I could see
the edge ... did not help enough! So I started over with that in mind.
|
|
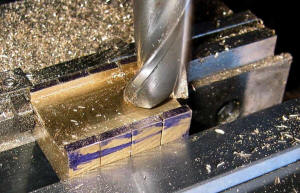
I did everything the same as before ... up
to cutting the flat work. Instead of milling to the layout lines I left
some material so that I could see the
line when milling the tapers, also I cut the upper and lower bolster
tapers at the same time. I placed my
scrapped out material in between the two bolster. Now when I finished
the upper I just reset the height to start a new taper for the lower
bolster. Looking carefully you can see red ink inside the grove ... same
idea when turning the taper for the bearing, leave just a trace so that
I know the depth is correct. If I were to do
it all over again I would just mill them in the angle vise and
make the cuts at the same time ... no real need to move to the other
vise as these are small cuts.
|
|
|
|
Another Test ... this time the fit is much better. All I needed
to do was to file down a little material here and there to get a smooth
fit with no binding. Much better ... slot widths all with spec.
|
|
The
Side Bearings ... were simple ... no problems! |
|


